.17 Megapixels to 35 Megapixels… WHAT?!?
My wife, kids and I went to Cannon Beach, OR a few weeks ago. We had a blast, it rained the entire time, but it was still very nice to be with the family on the West Coast (or the left coast as my East Coast roots would describe it). We had one good morning to take the kids to the beach, that’s it, out of 5 whole days, one good morning.
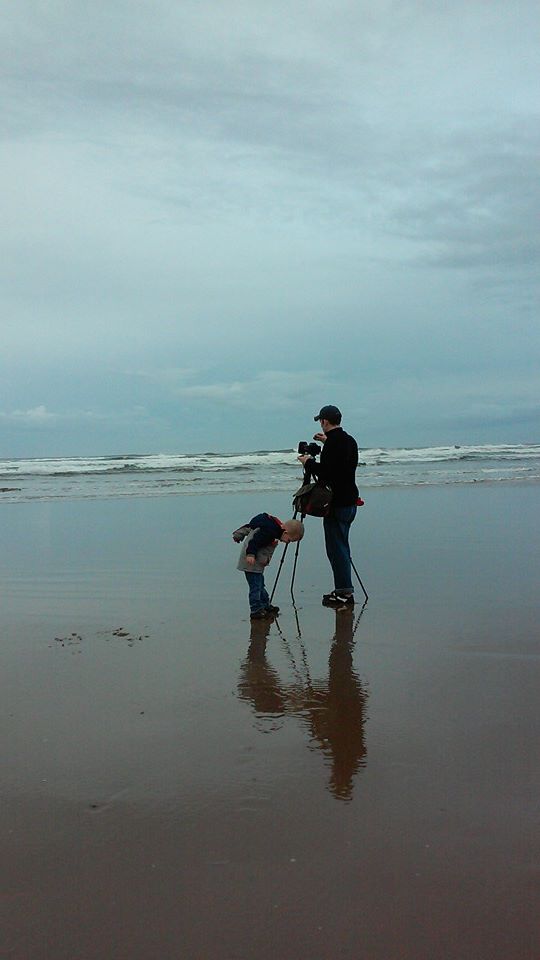
While I was doing some long exposure stuff my son, Michael, was pushing the sand around with his feet. I think he was fascinated by the wet sand under his boots for some reason. I was way too into my camera to notice this was a moment happening, but my wife saw it as a grand opportunity to grab a quick snapshot with her phone. Later I saw this picture on Facebook and loved it.

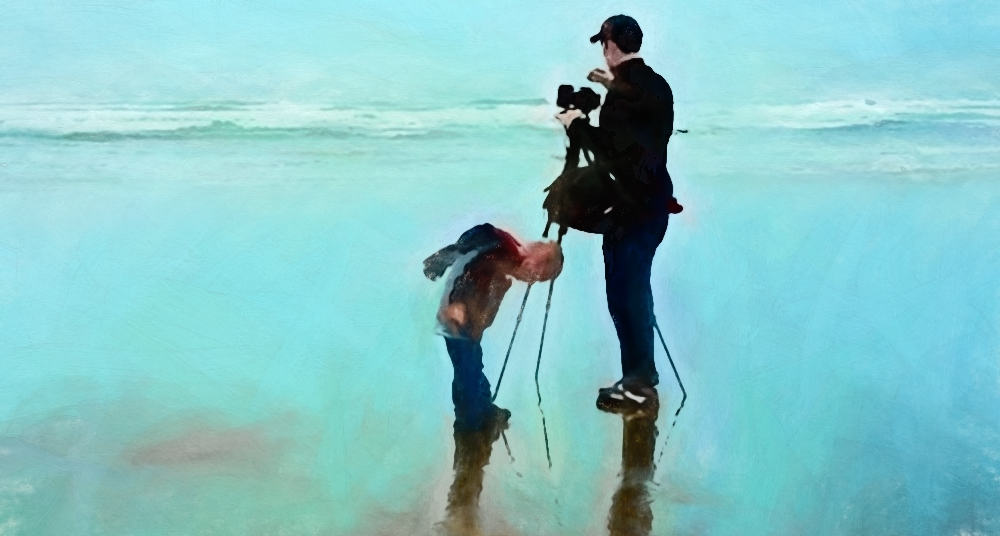
Me being the inquisitive artist that I am, grabbed the picture from her Facebook page (with her permission) and brought it into Photoshop. I cropped it to create more of a ‘moment’ and noticed it was very small and very pixilated. Just as I was about to dump it, I thought, “what would happen if I ran this through Topaz Impression?”
The results were stunning! I proceeded to blow the image up even more and run it through impression again, still stunning! In this tutorial I will show you how I took a .17 Megapixel Snapshot and turned it into a 35 Megapixel work of art!

Get Your Hands On Topaz Impression!
Like the style of this tutorial? You will LOVE HDR Insider! Full-Length HDR Workflows, Critiques & More!
[hcshort id=”5″]


A simple and effective way to salvage or rescue good images from a cellphone or early digital camera photo. Also works on a tiny crop from a large resolution image that might have something interesting appearing in an otherwise unusable file. As far as resizing is concerned, I’d like to mention OnOne’s Resize which minimizes pixelation with its algorithms and does the best job I’ve found outside of more expensive professional software. I’ve been using it for years. Impression eliminates any remaining undesirable effects. Thanks for sharing.
Thanks! I will have to look into onOne’s Resize. Great tip!
A great way salvage of low res photo!
I did some tests with Topaz Impression, if you take a photo and create different resolutions i.e.(72, 140, 200, 300) and run them thru the same Impression preset they get different brush strokes results…. from big and gritty (lower res) to a cleaner and a more detailed brush stroke with the (higher res). It makes a huge difference in the way it looks, so you can really fine tune your painting style!
That is AWESOME to know. I didn’t think the res would matter, that is interesting. I am going to have to play with that.
Excellent as usual. A masterpiece of an idea where you have tapped into your insight’s vault to bring us another inspiring demonstration of your skills. The shot apparently has little use due to its size, etc. but you show us what can be done with a bit of ingenuity and know how. Now I know what to do with Topaz Impressions. I particularly love the photograph your wife took of you and your son. The end result is simply beautiful. It reminds me of Joaquin Sorolla.
Thanks Carlos! It was purely accidental from point a to point b. This is one of those things that just worked for me! I do appreciate the feedback. I just looked up Sorolla, it is very similar in nature, especially his beach scenes with people strewn about.
thanks so much I can see ways of using this, yet another great tutorial Blake
Great tutorial Blake. My less than smart phone has 1-2 megapixels and images are very pixelated. I have used Topaz Impression to make them into something worth looking at even
though I seldom make prints. I had never considered changing the size in the way you instruct. Thanks for the info.
I had never really thought about it either, until this one. I just may have to print this large and on canvas.
Wonderful tutorial, as always, and I totally agree with you about Topaz Impression. You can make some truly amazing Fine Art.
You finally convinced me, Blake. What a delightful tutorial. By the way, I absolutely love your music track you use to bracket these tutorials. It’s uplifting and energizing and makes me even more excited to try the tips. Thanks, friend. I am looking forward to shooting with you sometime soon.
Another inspirational quick tip Friday video. I have done a similar technique using PS’s paint brush tools to paint in different strokes and colors on a tiny, low res, 1×1 inch photo of a buffalo. I first increased the size of the photo for printing. By painting layers of colors it increased the pixel size of the photo. I hadn’t thought about using Topaz Impression to add stroke patterns. I’ve, also, learned an over-done, pixelated HDR picture is perfect for creating wonderful art pieces using Impression.
GREAT! idea. Thanks!Blake for producing and sharing your ideas.
That’s a great recommendation, I can see how an overdone HDR image could benefit from Impression as well.
I am sorry I can’t help much here. The folks at Topaz may be able to lend you a hand though.
Very cool stuff Blake, I always learn so much from you and your tutorials are always interesting and easy to understand. Thank you for sharing!!
Awesome! Thanks for checking it out. I do appreciate it!
Topaz Impression is just one more tool I use along with other Topaz plug-ins that creates artwork from otherwise unusable low resolution photos. Since I have images that were taken before I got my current DSLR, some taken on a point and shoot camera, some on an early iPhone or even a Blackberry Pearl, and some of those photos had potential composition-wise but little else, being able to resize and apply a painterly effect to compensate and eliminate the low resolution artifacts has resurrected quite a few images that otherwise would have stayed hidden on some old drive or backup CD.
A significant portion of my printed art work I have for sale at the art shows I attend are artistic reworks of previously unusable photos.
Thus Impression and similar artistic filters do their magic and save them days!
Thanks for a great demo and wonderful image you created.
Bari
Great video. I tried Impression on a low res copy of a old wallet photo I had scanned to make a jpeg. Then did a watercolor in Impression after changing the size and resolution as you suggested. Everything worked great and I now have a new tool to make “art” from phone shots and copies. Thanks!