
A Little Bit Sharper
Over the last few years I have used many different Sharpening Techniques. I have found some better than others, from the High Pass to the Unsharp Mask to the various Plugins. All of these techniques are pretty great and do a decent job of sharpening. However, I find myself making a lot of masks to block out areas I don’t want sharpened.
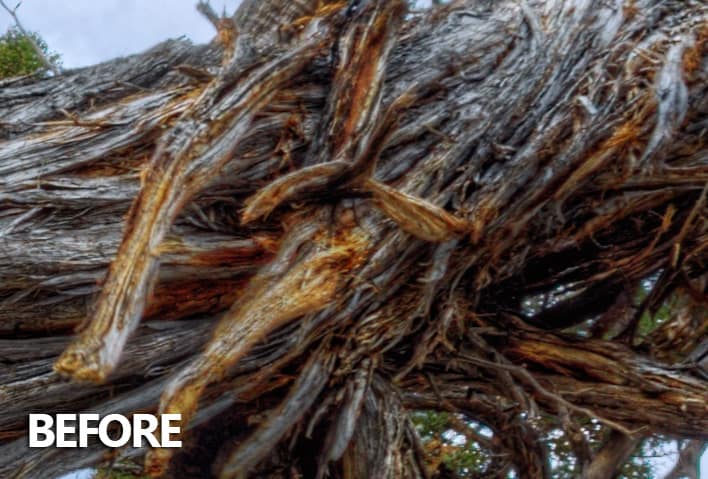
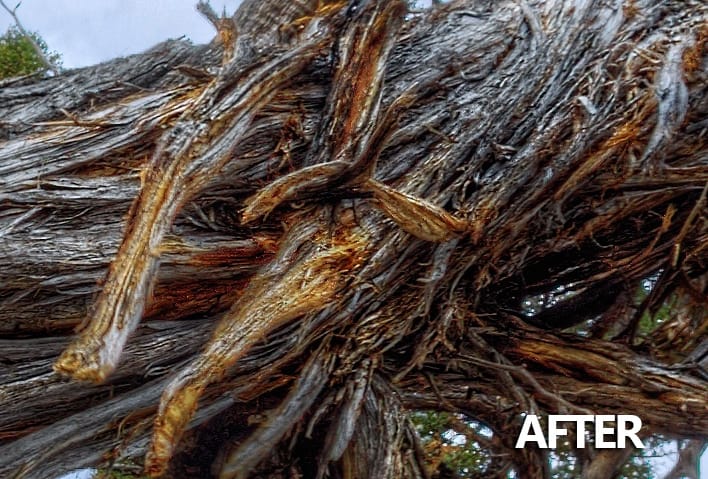
I was working on the photo below and knew I did not want the sky sharpened as well as some of the background elements. Instead of using the traditional masking techniques, I used the Sharpen Tool… I know of all things right, a tool that actually does what we sometimes make so difficult!

I noticed that it worked really strong at 50% and was almost unusable, but instead of starting over I changed the Sharpened Layer into a High Pass Sharpen Layer….
EUREKA! I was stoked by how well the High Pass layer worked on the already sharpened layer. It refined the sharpening effect and made the tree look so real I could almost touch parts.
In this tutorial I will show you how it is done and there is also a downloadable action that does all the hard to remember stuff for you 🙂

For Blake, it's all about the art and process synergy. He dives deep into complex topics and makes them easy to understand through his outside-the-box thinking so that you can use these tricks in your workflow today!


Wow, Blake. This has some wonderful potential. As it were, I’m working on a digital painting for a client right now. I will be testing this out on my painting. I always enjoy your tutorials. Thank you so very much for sharing.
Betty
Thanks, Betty! I was dumbfounded when I saw how easy/powerful this technique was. It has become my go-to sharpen method. I hope it works out well for you on your painting!
Great tutorial Blake. Thanks for putting it together. The sharpen tool is one of those tools on the toolbar that I often overlook. I’m especially intrigued by the localized control on sharpening that it gives you.
It is tucked away petty quietly, but it is very powerful for local adjustments.
Thanks for sharing this option. I think back to all the times and filters I’ve used to get the desired level of sharpening. I will say that Topaz Clarity helps in many cases. I’ll try this one.
Clarity is great also. Another tool for great global detail.
I agree with Betty, 100%…Your tutorials make me look like a professional. I can’t thank you enough for all of these great actions…always amazed at the way you help us…Thank you. William
Thanks William! Just glad I can help!
I can’t get the sound on this tutorial.
Are you using an iPad? The reason I ask, many people have had issues with YouTube and iPads.
No, I am using a desktop computer.
Interesting! Which browser?
I am running Windows 8.1
Wow, excellent tutorial . Thanks so much for creating the action. What a difference it makes to my photos. You are the master
Another great Tutorial from you Blake, your so easy to follow and understand, that’s what I love most.
I don’t get any sound if I try to watch your video clips from your website, I have to always go to YouTube to watch them why is that?? I’m using a MacBook Pro.
…Maxine
Thanks! It may be something to do with a Mac, I have heard this on several occasions from others. I do apologize!
Does it only work on PS6?
No it works on CC I did the tutorial on cc
hi Blake nice and simple but very effective. i us lightroom to pick out bits of sharpening, this i am going to be using as it will all be in same place and more control, i just love it thanks a bunch
Not a problem! Glad you like it as much as I do!
Blake:
As always, thank you for the action! But most of all, thank you for helping me improve both my photography and my processing 100%!
Sweet glad to hear it! I am here to help, it’s nice to hear that these tutorials are doing just that!
Blake, this is just what I was needing! I always forget about the desaturate trick! Thanks so much for this action. I will be using it immediately :).
Pam
Awesome! The desaturate is the key! Thanks for watching 😉
Thanks, Blake. One of the advantages of being retired is that I can watch several photography tutorials and webinars a week. You are far and away my favorite instructor; easy to listen to and understand, always informative, great tips and techniques, and free actions to boot! I certainly hope you keep this up.
That is awesome to hear! Wow, I am honored! You just made my week and it just started 🙂 I will keep this up as long as I am able to speak. I truly love my job and it makes it all the more rewarding when I receive feedback like this! THANKS so much!
You are amazing! Thanks for sharing.
Thanks! Just doing what I can, I appreciate your feedback!
I’ve never used those sharpen tools in PS or heard of the unsaturate command. Two great tips I’ll be using.
FYI … Your “Purchase My Link” on the sidebar is broken.
Awesome! Glad I could help! Thanks for the heads up on the link, I forgot I took that down last month.
Blake, I have been using the Sharpen Tool at 30% for years but never thought of using it with the High Pass Filter. Thanks.
Jim
No problem! It’s nice because you can reduce the color noise pretty early with it.
Thanks again, Blake! I usually use Topaz Labs’ Detail 3 for output sharpening, but find it is more time consuming to do selective creative sharpening in my workflow toward the end, mainly because I want to be selective so I have to use various methods of masking depending on the nature of the image. This will save me a lot of time as well as making the non-destructiveness of the workflow hold together better for future tweaking with saved Ps projects. Detail 3 is still great for creative sharpening, too, but this way, I can be more subtle and realistic using the right tool for the job.
Hi Blake,
Another great tutorial. Thanks.
One thing that i discovered by trying out this technique was that i needed to Uncheck the ‘Protect Detail’ checkbox on the Sharpen tool’s toolbar. When i left it checked, the sharpen tool had very little effect. I tried it out on the hair of 2 people in a portrait that i took.
I will now be using this technique for sharpening my portraits.
Thanks again.
Darren
Thanks, Darren!
I leave it checked, when it comes to sharpening, I like it to be subtle. I found that when I unchecked it, the sharpening affected the image too fast and appeared sharpened. It is all about personal preference though!
This is just awesome, thanks so much for sharing this great tip!
This selective shaping technique blows me away. It is so fast with great results. Thanks for showing it.
🙂 So glad to hear it! I was pretty dumbfounded when I stumbled upon it too. I love PS happy accidents!
Wow – how great is that?!?! Thank you Blake
You are welcome, Jerry! It is quite a fun parlor trick, eh?