
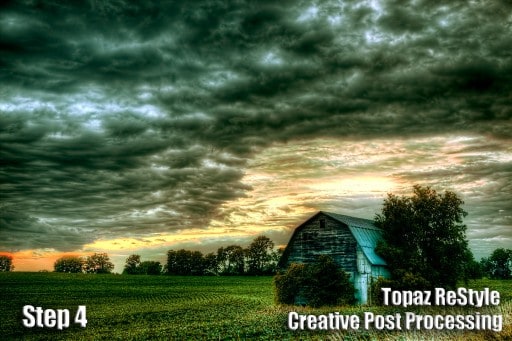
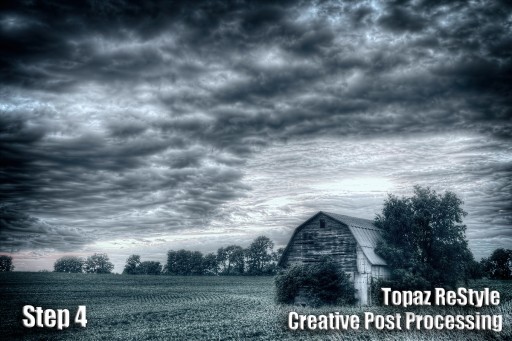
My 4 step Creative HDR Process as revealed during Topaz Labs Webinar Series
DOWNLOAD THE PRESENTATION
I have also provided the set of brackets I used for the presentation so you can experiment with them as well. My 4 Step Creative HDR Process goes a little something like this:
- Good quality brackets from the camera – Good composition, free of camera shake
- Mild tone mapping- Not too dark, light, or stylized… Avoid over saturation!
- Post Processing- Noise reduction, color correction, tone curve adjustments, dodge and burn, sharpen, etc.
- Creative Post Processing- Dive into the creative realm with masking, vignettes, borders, textures, compositing, etc.
DOWNLOAD THE BRACKETS
I would love to see how creative you get with the brackets provided.
- Download them and have a crack at them yourself!
- Leave a comment on this post with a link (Flickr, 500px, Facebook, etc) to your representation with a few details about your creative workflow.
- On the site that you upload your image, put something along these lines of “My take on the Images provided by Blake Rudis for the 4 Step Creative HDR Process Topaz Labs Webinar”.
- I can’t wait to see the products of your creative processes!

f.64 Academy and f.64 Elite are the brainchildren of Blake Rudis. While he is a landscape photographer, he is most passionate about post-processing images in Photoshop and mentoring others.
For Blake, it's all about the art and process synergy. He dives deep into complex topics and makes them easy to understand through his outside-the-box thinking so that you can use these tricks in your workflow today!
For Blake, it's all about the art and process synergy. He dives deep into complex topics and makes them easy to understand through his outside-the-box thinking so that you can use these tricks in your workflow today!


Blake, I was at the Webinar today and was really pleased to watch you manipulate the photo and create HDR. Also I appreciated that you simplified the camera selection the way you did. I have a Fujifilm HS30 exr bridge camera. I wll bracket +2 to -2 in a 3 shot burst. I have tried but not very succussfully because I am too cheap to get Photomatix. I did get Topaz Adjust and have been fooling with it. I primarily use Corel PaintShop Pro Ultimate at this point but it seems that I might be following in your path with Photomatix and Topaz, as long as the boss is ok with it. But seriously, thanks so much for demystifiying the process.
Thanks for attending the webinar. The camera doesn’t really matter, I mean, the more megapixels the sharper it will inevitably be. However, your only limitation is yourself as an artist or photographer. AEB is a nicety, but even if you didn’t have it you could manually change the shutter speed if you were very careful and tripod mounted. You cannot go wrong with the PhotoFXLab and Photomatix combo. Especialy when you can get photoFXlab for 30% off with the discount code. It is a great programmer for beginners to develop a professional workflow that would transition nicely into Photoshop. Actually, it is the most bang for your buck (just convince the boss of it :)!
Unfortunately, Photomatix is going to be necessary to get that nice tone mapped image. However, there are other options, like layer blending with masks. I appreciate your feedback and wish you the best of luck in your HDR endeavors. Please come back often and ask me anything you want. I am an open book with my processes.
Blake, I really enjoyed your Webinar and the download of the barn photo. I did process it using Photomatix, and the following Topaz plugins: Clarity, Detail, Denoise, & Restyle. I used the Saffron Sunset Preset in Restyle. My Flickr name is Gaelic Images2009. Thanks again!
Blake, my image is up on my photostream(Gaelic Images2009) & on the Topaz Restyle Group. Thanks!
Very nice work my friend. It got a little contrasty in the upper left hand corner, but that could also be due to the file compression for web. The color tone looks great! I like the mood you have created with this one.
For everyone else, here is the link to Pat’s photo.
http://www.flickr.com/photos/38775713@N03/10311013033/in/pool-topazrestyle
I uploaded the brackets in Bridge CC to Photoshop CC and used the 16 bit photorealistic preset to produce a tif. I processed the tif in Restyle with Cumulus Cameo. I had to do lots of slider adjustment so I created a new preset in case I need to do it again.
Link in Picasa:
https://picasaweb.google.com/118046911981253725725/BlakeRudisWebinarMyResult?authuser=0&feat=directlink
Very nice color tint work in ReStyle, I would definitely have saved that preset for future sunset photos!
Hi Blake I missed this one. When will it be on youtube?
Damien
It will be on Topaz Labs’ YouTube channel. I will link it when it is up!
Blake, loved the webinar!! Very informative and gave me the confidence that I’m headed in the right direction with my HDR. I’m also of the type that doesn’t care for the over saturated HDR pictures, I want it to look natural but still make you go “oohh I didn’t see that!!”
My process.
your brackets in Photomix
My settings were pretty much the same as yours after doing it.
Edited in Lightroom
Temp +26
Contrast +24
Highlights -100
Shadow -5
Whites +2
Blacks 0
Clarity +12
HSL – Saturation only
Green -20
Aqua -2
Blue -23
Purple +2
Sharp +127
Noice 30
Post Crop Vignett +30
I used the brush tool to burn in a few areas in the sky, and dodge some of the tree areas.
I also ran it through Topaz Restlye
Eggplant and Thistle Purple Opacity at 45%
One thing I noticed after I ran it through photomatix, was I didn’t have the purple Chromatic Abrassions you pointed out during your webinar. Any reason why you did and I didn’t ?
Here’s my picture
http://www.flickr.com/photos/10480077@N06/10343952053/
I am glad you enjoyed the Webinar! Your description of how you want your HDR to look is spot on to get you headed in the right direction! I could not agree with you more. You photo looks great! Thanks for taking the time to work on it and share it with us!
I am not sure if I told Photomatix to reduce the aberration or not. Sometimes I do, sometimes I don’t. I have noticed that when you tell Photomatix to reduce the aberration it expands the picture a bit. So, if you try to import one of the original exposures on top of it, it will be slightly smaller than the expanded tone mapped file. In order to get rid of the aberration it has to blow the image a bit out of proportion. I may not have done it for this photo.
An excellent way to learn Blake, thank you.
My take on it here:
http://www.flickr.com/photos/40516254@N00/10354344885/
My workflow consisted of:
Photomatix for some light tone-mapping
Lightroom 5 basic editing
Topaz Clarity
Topaz ReStyle
Lightroom 5 for minor adjustments
I am very glad you enjoyed it! I think sometimes this is the best way to learn. Looks like you have a pretty good workflow, bouncing from one program to the next, that shows you know how to manage the photo at different times.
The image looks great, I like the moody feel you gave it with the color tones! Keep it up my friend!
Here is my humble attempt at providing a decent representation of the brackets…
1) Photomatix- Adjusted for a baseline tone map.
2) ACR- Highlights, shadows, and aberations were worked on here with some color correction and white balance adjustments
3)Photoshop- Here I just utilized curves adjustment layers with “apply image” to edit highlights and shadows. I also did a little dodging and burning.
4) Topaz Detail- To bring out some detail in the barn.
5)Topaz Lens Efx- Reflector with some added warmth.
6)Topaz DeNoise- In the sky and around the darker portions of the barn (used the BR preset 🙂
7) Photoshop- Finishing touches like slight Gaussian Blur, lightening, and vibrance on the sky.
Thank you Blake for keeping us involved and learning.
With Great Respect, Tal
http://www.flickr.com/photos/zionsstudios/10381900513/
Very nice work! I like how well you processed this one from tone mapping to completion. It looks great! Thanks for adding your representation here.
Hi Blake,
Seems that the link to the brackets is dead. I tryed to download it today and it failed.
Thanks
Marcio
Can you send me the error message? I just downloaded it with no troubles, thanks!
Hi Blake,
one more cool tutorial from you.
Before that tutorial I called Topat Adhust 5 and Topaz Detail 3 for my own. After that I bought also Topaz Photo FXLab, Topaz ReMask 3 and Topaz Clarity. The oppunitys are awesome.
Thank you.
Harry
Awesome! I am glad you got some mileage out of it. So glad I could help! Take your creative visions to the next level my friend and consider yourself upgraded!